An S-type load cell measures tension and compression. It is primarily used for tension, such as in hanging scales, hopper weighing, and crane systems. Its key feature is the “S” shape. This design lets you apply force through threaded holes at both ends.
Before even thinking about installation, take a moment to confirm:
-
Rated capacity matches your application
-
Load direction is clearly defined
-
Mounting threads are compatible with your hardware
-
Environmental conditions (humidity, temperature, vibration) are within limits
A trustworthy S-type load cell manufacturer will always include a datasheet with these specs. So, make sure to read it.
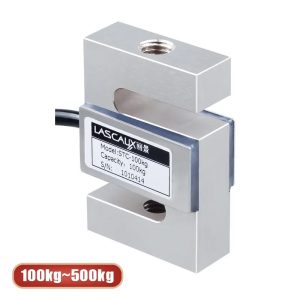
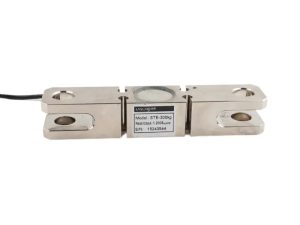
STC S Type Load Cell For Crane Scales
S Type Load Cell Installation: The Direction of Force Matters
One of the most common issues in s type load cell installation is incorrect force direction. It sounds obvious, but in practice, people often get it wrong—especially when the setup is crowded or improvised.
Key Principle: Load Must Follow the Axis
The load should be applied strictly along the central axis of the load cell. Any deviation—side load, bending, or torsion—can lead to:
-
Measurement errors
-
Permanent damage
-
Reduced lifespan
Installation Tips
-
Always align the upper and lower mounting points vertically
-
Use eye bolts or rod-end bearings to allow slight movement and prevent lateral stress
-
Avoid rigid connections that don’t allow self-alignment
-
Ensure the load is centered—off-center loading introduces torque
A good habit is to visualize the force path as a straight line passing through the center of the load cell. If that line bends, your readings will too.
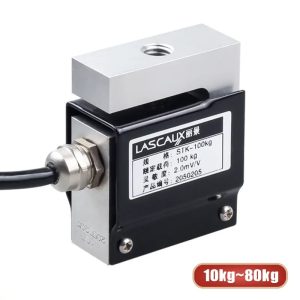
STK S Type Load Cell For Packaging Scales
S Type Load Cell Mounting: Hanging vs Fixed Installation
When it comes to s type load cell mounting, there are two main approaches: hanging (tension) and fixed (compression or hybrid setups). Each has its own advantages and pitfalls.
1. Hanging Installation (Most Common)
This is the classic setup—think of a hanging scale or suspended hopper.
How it works:
-
The top end is fixed to a support structure
-
The bottom end carries the load
Advantages:
-
Naturally aligns with gravity
-
Minimizes side loads when done correctly
-
Easier to install and maintain
Best Practices:
-
Use swivel joints or shackles
-
Keep cables free from tension or pulling
-
Ensure the structure above is rigid enough
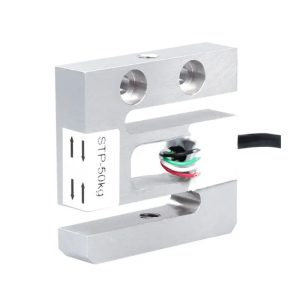
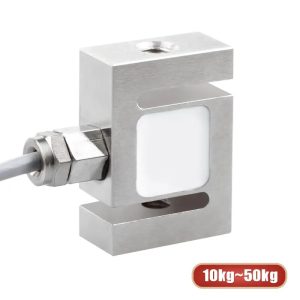
STP Micro S-Beam Load Cell for Tensile Testing
2. Fixed Installation
In some industrial setups, the load cell is integrated into a structure rather than suspended.
How it works:
-
One or both ends are fixed
-
Force is transmitted through mechanical structures
Advantages:
-
More compact
-
Suitable for embedded systems
Challenges:
-
Higher risk of side loading
-
Requires precise mechanical design
Best Practices:
-
Use mounting kits designed for S-type load cells
-
Incorporate flexible couplings
-
Regularly check for misalignment
A seasoned s type load cell manufacturer often offers dedicated mounting accessories. Using these instead of custom improvisation can save a lot of troubleshooting later.
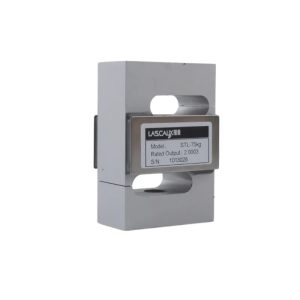
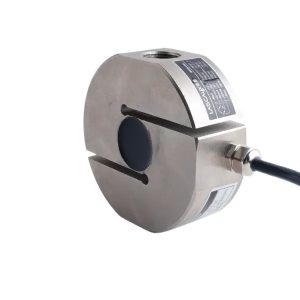
STL S Type Alloy Steel Load Cell For Tank Scales
S Type Load Cell Wiring Diagram: 4-Wire vs 6-Wire Explained
Wiring is where many installations quietly go wrong. Even if the mechanical setup is perfect, poor wiring can introduce noise, drift, or unstable readings.
Let’s break down the typical s type load cell wiring diagram.
Standard 4-Wire Configuration
Most basic load cells use four wires:
-
Excitation+ (E+) – Power supply positive
-
Excitation- (E-) – Power supply negative
-
Signal+ (S+) – Output signal positive
-
Signal- (S-) – Output signal negative
Typical Color Coding (may vary):
-
Red: E+
-
Black: E-
-
Green: S+
-
White: S-
Always verify with the manufacturer’s datasheet—color codes are not universal.
STM S Type Load Cell For Belt Scales
6-Wire Configuration (More Accurate)
Higher-end systems often use six wires:
-
Same four as above
-
Sense+ (Sen+)
-
Sense- (Sen-)
Why it matters: The sense wires help fix voltage drops in long cables. This keeps the load cell getting a steady excitation voltage.
When to use 6-wire systems:
-
Long cable runs
-
High-precision applications
-
Industrial environments with electrical noise
Wiring Tips That Make a Difference
-
Use shielded cables to reduce interference
-
Ground the shield at one end only (usually the indicator side)
-
Avoid running load cell cables alongside power lines
-
Keep connections clean and secure
A good S type load cell manufacturer gives a clear wiring diagram. Follow it closely instead of guessing.
STE S Type Alloy Steel Load Cell For Hopper Scales
Common Mistakes (and How to Avoid Them)
Even experienced technicians run into issues with S-type load cells. Here are some of the most frequent mistakes seen in the field.
1. Side Loading
The load is tilted, which leads to inaccurate readings and may cause damage.
Fix: Use proper mounting hardware and allow for self-alignment.
2. Over-Tightening Threads
Problem: Excessive torque on mounting bolts Result: Internal strain, measurement drift
Fix: Follow torque specifications from the s type load cell manufacturer.
3. Ignoring Cable Strain
Problem: Cable is pulling on the load cell Result: False readings
Fix: Secure the cable separately and leave slack.
4. Incorrect Wiring
Problem: Misconnected wires or wrong polarity Result: No signal or unstable output
Fix: Double-check the s type load cell wiring diagram before powering up.
5. Environmental Neglect
Problem: Exposure to moisture, dust, or extreme temperatures Result: Corrosion, signal drift
Fix: Choose a load cell with appropriate IP rating and protection.
6. Skipping Calibration
Problem: Assuming factory calibration is enough Result: Inaccurate system-level measurements
Fix: Always calibrate after installation using known weights.
STM200A S Type Alloy Steel Load Cell For Medical Testing
Choosing the Right S Type Load Cell Manufacturer
Not all load cells are created equal. The choice of s type load cell manufacturer plays a significant role in long-term performance.
What to Look For
-
Clear documentation and wiring diagrams
-
Availability of mounting accessories
-
Technical support
-
Proven track record in your industry
A good manufacturer doesn’t just sell a sensor. They offer a complete solution. This includes guidance on how to install and troubleshoot s type load cells.
Installing an S-type load cell isn’t complicated, but it demands attention to detail. The mechanics, wiring, and small choices like cable routing shape your system’s reliability. They can ensure it runs smoothly or transform it into a constant headache.
If you keep three things in mind, you’ll avoid most problems:
-
Align the force correctly
-
Use proper mounting techniques
-
Follow the correct wiring diagram
If you are ever unsure, please contact us without delay for professional support.